Set up Stream Buddy with the SupportKori Bridge extension
Updated on 28 Jul 2026 · 4 min read
SupportKori Bridge is a free Chrome extension that connects your OBS and your live chat (YouTube / Facebook) to your Stream Buddy dashboard — so you can switch scenes, mute mics, feature comments and run tip challenges right from your browser. Setup takes about five minutes.
1. Install the Bridge extension
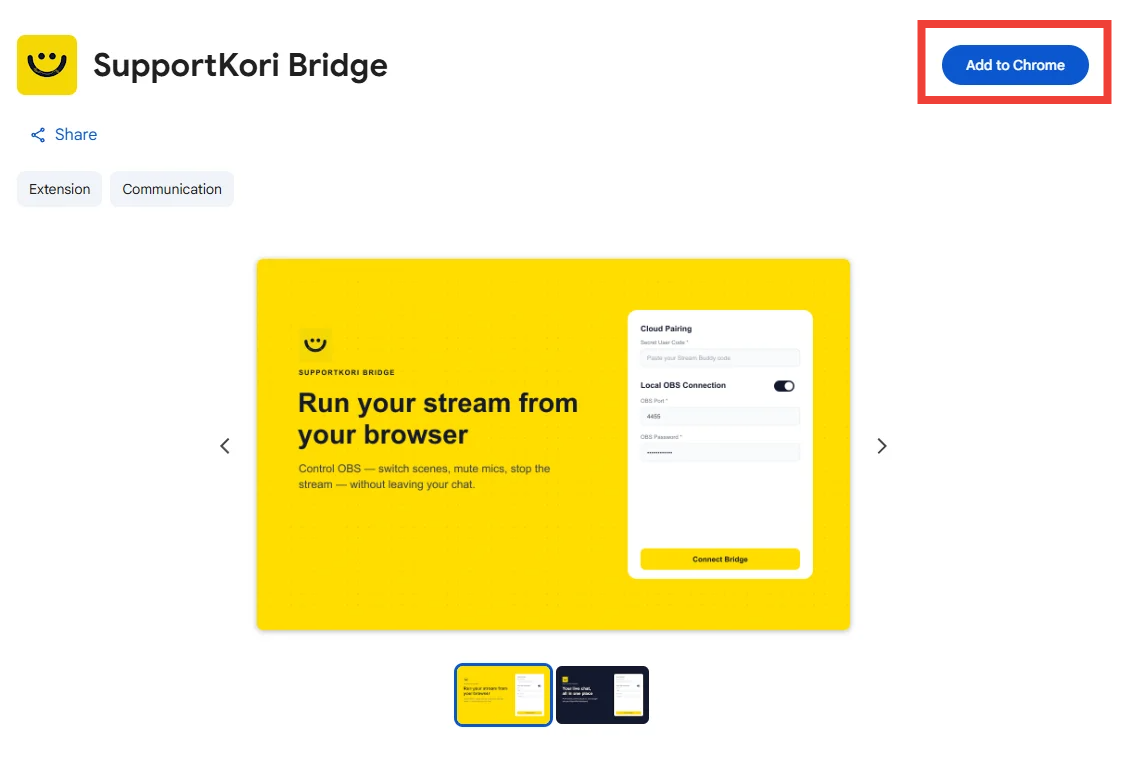
- Open the SupportKori Bridge page on the Chrome Web Store.
- Click Add to Chrome, then Add extension in the popup.
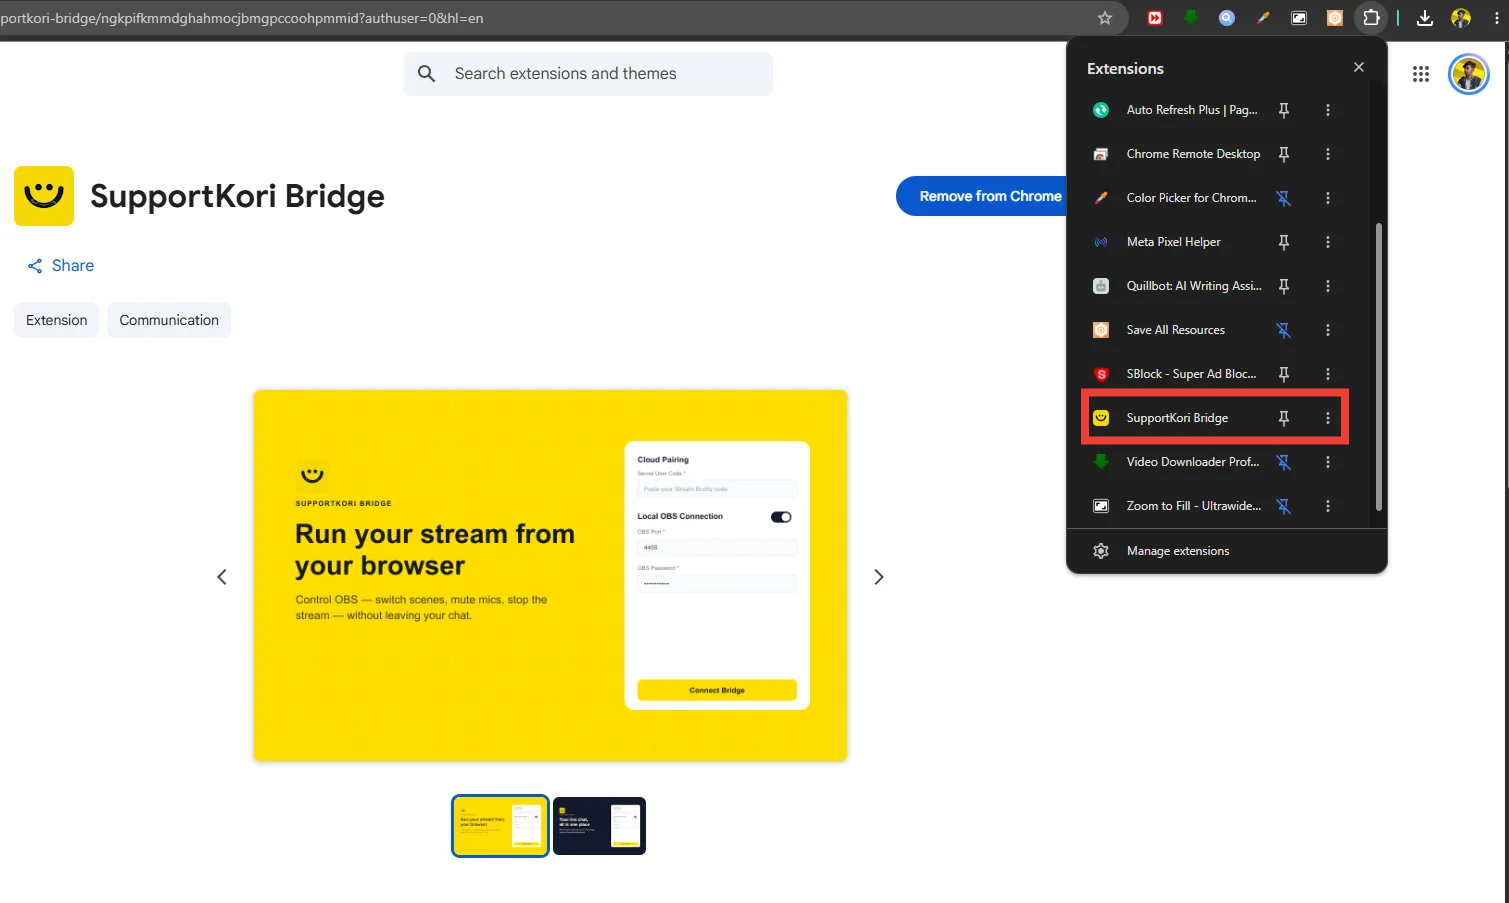
After it installs, click the puzzle icon in your Chrome toolbar and press the pin next to SupportKori Bridge, so it's always one click away while you stream.
2. Pair it with your dashboard
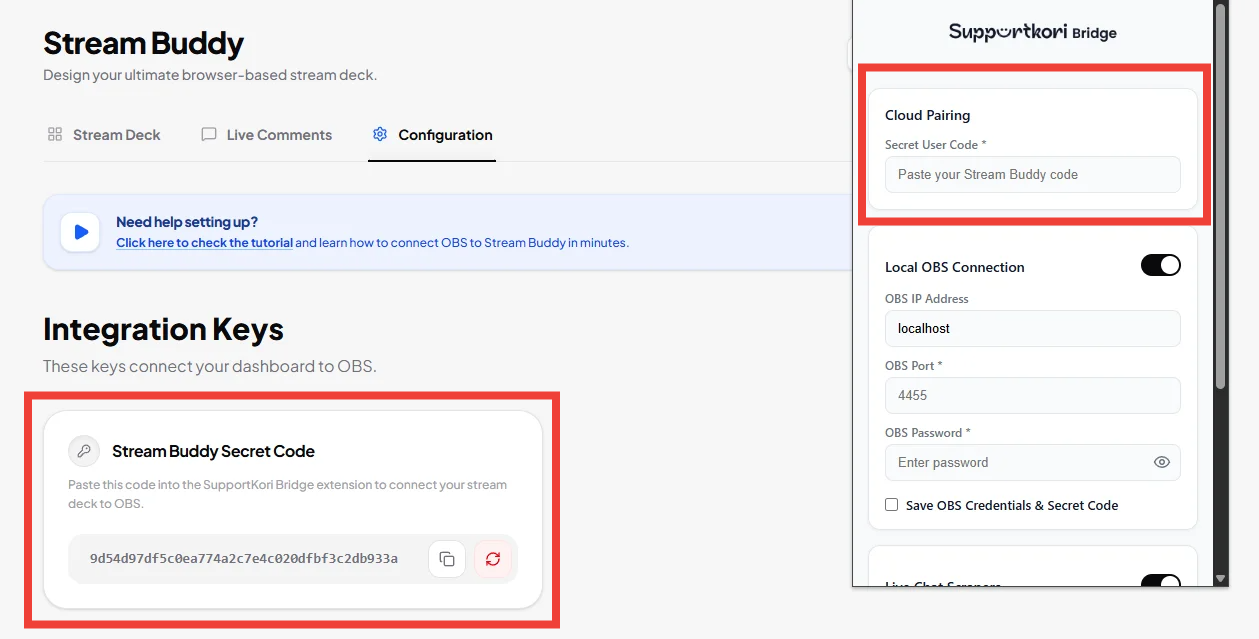
The extension needs your personal Stream Buddy Secret Code so it knows which dashboard to talk to.
- Go to your SupportKori Dashboard and open Stream Buddy from the left menu.
- Open the Configuration tab.
- Under Integration Keys, copy your Stream Buddy Secret Code.
- Click the extension icon and paste the code into Cloud Pairing → Secret User Code.
3. Turn on OBS WebSocket
OBS has a built-in remote control called WebSocket (OBS 28 or newer — no plugin needed). The Bridge uses it to press buttons in OBS for you.
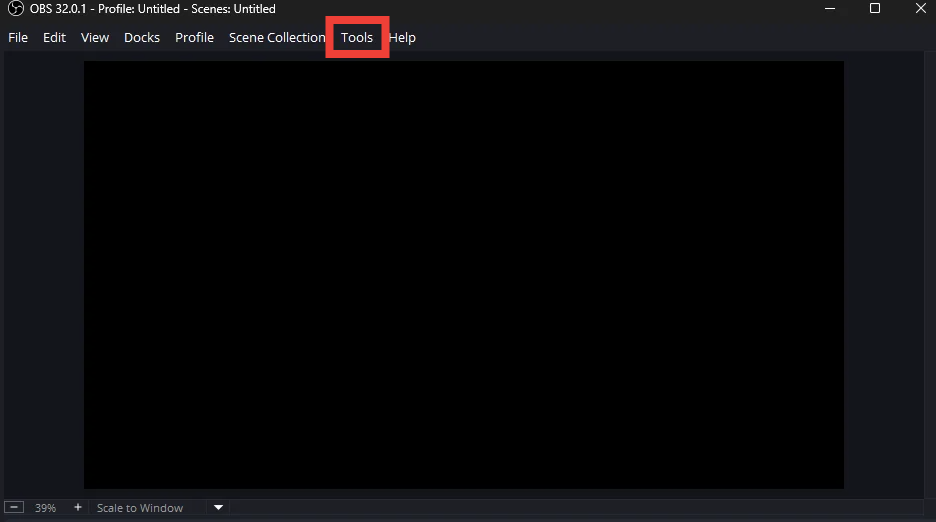
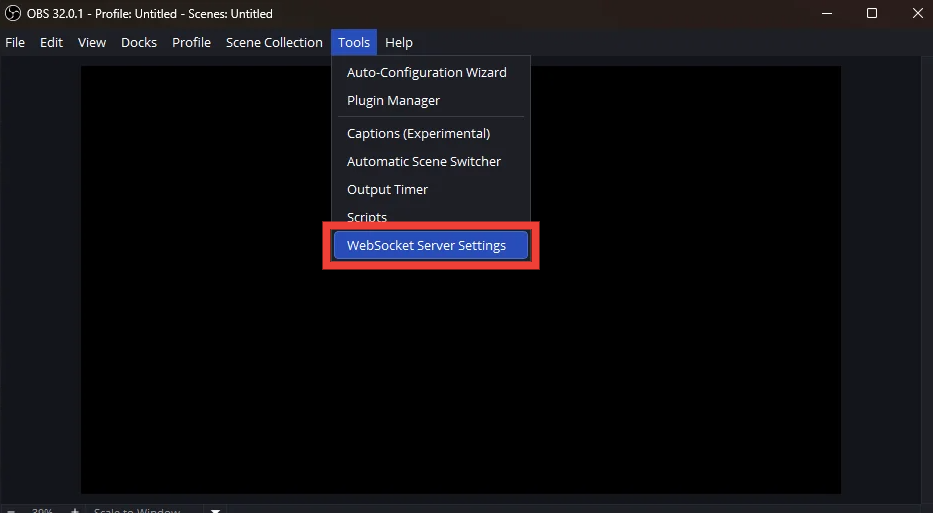
- Open OBS Studio and click Tools in the top menu bar.
- Select WebSocket Server Settings.
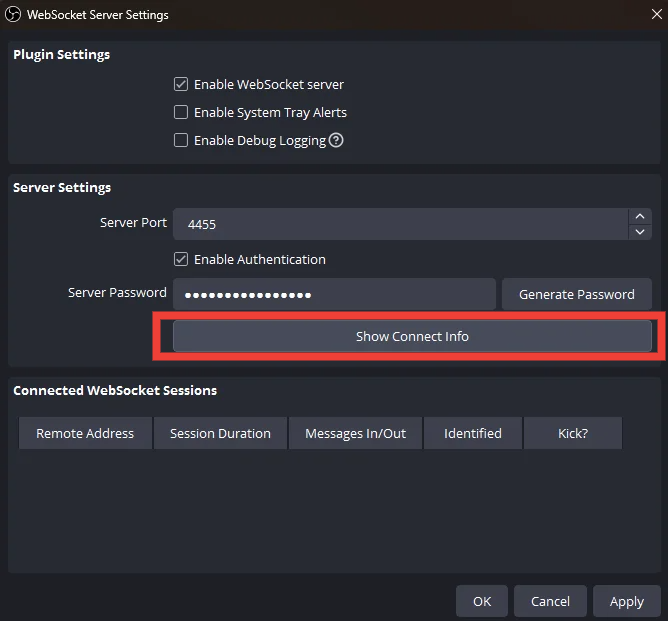
In the window that opens, tick Enable WebSocket server, click Apply, then press Show Connect Info.
4. Copy the connection info
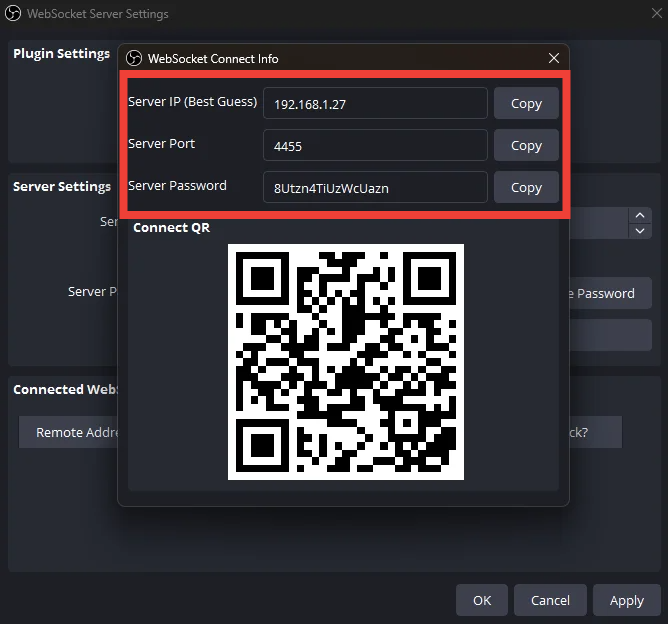
The Connect Info popup shows everything the extension needs:
Now open the extension again and fill in Local OBS Connection:
| Extension field | What to enter |
|---|---|
| OBS IP Address | The Server IP from OBS — or just localhost if OBS runs on the same computer |
| OBS Port | 4455 (the Server Port from OBS) |
| OBS Password | The Server Password from OBS |
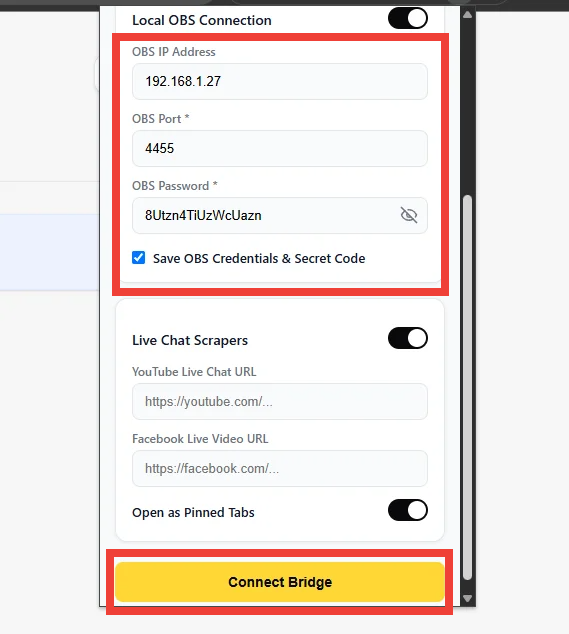
Pro Tip: Tick Save OBS Credentials & Secret Code so the Bridge remembers everything — next stream you just click Connect.
5. Add your live chat links (optional)
Want your YouTube and Facebook chat inside Stream Buddy's Live Comments tab, ready to feature on stream? Turn on Live Chat Scrapers and paste your links:
- YouTube Live Chat URL — the URL of your live video (youtube.com/watch?v=...).
- Facebook Live Video URL — the URL of your Facebook live post.
- Keep Open as Pinned Tabs on — the Bridge opens the chats as small pinned tabs and reads them from there.
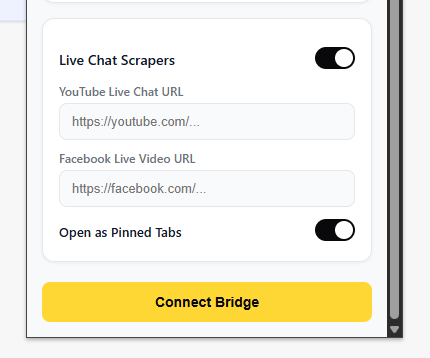
You can paste these after you go live — that's when the URLs exist. Streaming on just one platform? Fill in that one and leave the other empty.
6. Connect & go live
Hit the big yellow Connect Bridge button. Within a second you should see:
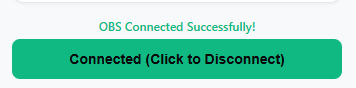
That's it — open the Stream Deck tab in Stream Buddy and your buttons now control OBS: switch scenes, mute your mic, play sounds, trigger instant replays, even start or stop the stream. Feature comments and tip challenges from the Live Comments tab.
Not connecting? Check these first:
- OBS must be open before you click Connect Bridge.
- Re-check the password — it changes every time you press "Generate Password" in OBS.
- If OBS runs on the same PC as Chrome, try localhost as the IP.
- If you reset your Secret Code on the dashboard, paste the new one into the extension.
Did this article help you set up?